Showing posts with label Autos. Show all posts

Thursday, February 28, 2013

Bus-y Words - A quilt for my Dad.

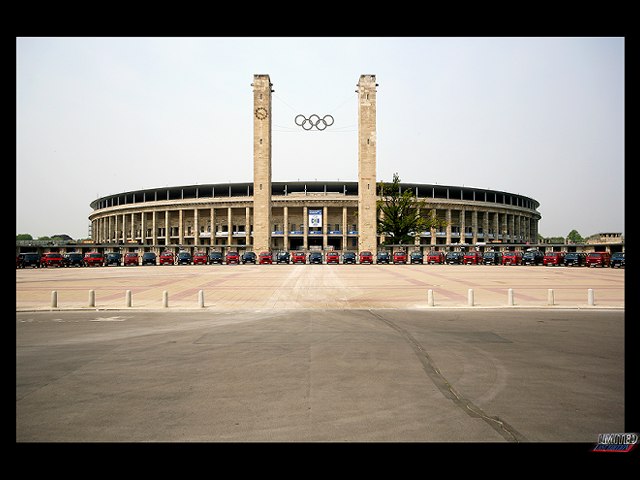
My dad turned 60 a month ago. Around christmas I decided to make him a quilt. The inspiration for that quilt was obvious. My dad loves his old Volkswagen Bus. A Limited Edition Bus. In 1992, VW offered 2500 Busses in two colour ways: red and blue. Many owners of those “Last Limited Edition” Busses meet regularly. It’s kind of a fanclub that you can only be part of if you own one of those 2500 busses. Here’s a photo of their meeting 2006 in Berlin:

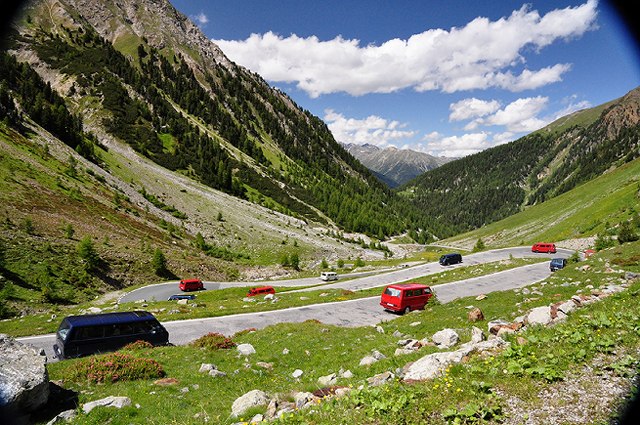
Or 2011 in Prutz, Austria:

He is kind of crazy when it comes to his Bus.
So this blue Volkswagen Bus was the theme for his birthday quilt. I needed a proper sketch of his bus so I could trace it onto fabric. I found a technical drawing online:

Bulli Skizze

The only thing I had to re-design were the alloy rims, as he had soon decided that the original ones were too small (o: I searched for a photo of his bus to trace his light-alloy rims:

DSC_0156_bb

Then I started fusing fabric on double sided fusible web, tracing, cutting, sewing and applique-ing.

Papas Quilt Bulli

The next thing was the Limited Number. VW produced 2.500 Busses for this Last Limited Edition. Here is the number of my Dad’s Bus and the special sign for this Edition:

Papas Quilt (1) Papas Quilt

And this was the worst part: Cutting all these tiny letters and numbers…

Snipping away

And then I had to fuse the letters to the background and attach them with a zigzag stitch.

Papas Quilt Applique

Here is “his” number: 134:

Papas Quilt Limited Number

And without further ado, here comes the quilt I made for my Dad’s 60th Birthday:

Papas Quilt Outdoor

This is a close up of all the appliqued parts.

Papas Quilt Close Up

It took some time to get this amout of applique done and the best was yet to come! I tried some new free motion quilting! Instead of making a label on the back, I wrote the entire message all over the quilt top! It is hard to see but the entire background is quilted with words. To make it visible I used the flash of my camera:

Papas Quilt FMQ before washing

To spread the words evenly over the quilt it took lots of planing and preparations and I ended up pre-marking the words.

Papas Quilt Detail of FMQ and Binding

Above you can see the pre-wash state with the chalk-marked letters.
And below you see the post-washed state.

Papas Quilt Quilting after washing

In case you wondered WHAT I wrote all over the quilttop: A congratulation to his birthday, an enumeration of all the ways he used his VW Bus (shuttle for kids and their friends, bus for our athletics’ group, camper, wedding-“carriage” at my sister’s wedding,etc.), and an enumeration of all the countries he visited with his bus (most parts of Europe) and of all the places he visited with his the “fanclub” (and my faithful mother).

I attached the binding with my preferred triple zig zag stitch and squeezed in my nametag:

Papas Quilt Binding and tag

The backing is made of the same fabric as the background of the top – and the same as I used for my mother’s quilt. So when they are folded up they look identically.

All that applique-ing and marking and quilting took very long but it was easy to persevere as I was sure I had chosen the right gift and was looking forward to his joy in receiving it.

However, I didn’t finish it in time for his 60th birthday, I was 3 days late. But as his party was sadly cancelled due to the severe and high-feverish influenza he had caught, nobody noticed. When they returned from their holidays, I drove over with the kids and I gave him his quilt. And I’m happy to report that he really liked it and stated that he’d probably never get a better gift than this quilt.

The end (o:
Happy Quilting everyone!
Christine

Saturday, October 27, 2012

2 in 1: Drawstring bag and play mat–An easy tutorial

Our little neighbor turned 4 last week. He is a huge fan of cars. I think he owns several dozen toy cars. Last year I made this quilt (reversible play mat) for him:

Quilt Julius Collage

I had plenty of the backing left and made a portable playmat for him this year. When visiting his grandparents he loves taking some tons of toy cars with him. I thought that an unfoldable drawstring bag would be a great idea and came up with this:

Drawstring Playmat (3)

A giant drawstring bag that doubles up as a playmat when unfolded:

Drawstring Playmat (2)

As it was really easy to do, I took some photos along the way so you can make your own – for little neighbors, sons, grandsons, nephews, etc. You get my point (o;

1. You will need two squares of fabrics: with a length equal to the width of fabric (approx. 42”). Draw a circle by pinning a strip of fabric (or a selvage) to the middle of the square and attaching a fabric marker at the other end of that strip.

Drawstring Playmat (4)

2. Cut out these giant circles.

Drawstring Playmat (5)

3. Sew a 1/2 – 3/8” buttonhole onto the outer fabric. Around 3-4” away from the edge. Open the buttonhole with your seam ripper.

Drawstring Playmat (6)

4. Lay out the fabric circles right sides together and sew all around them – leaving a small opening through which you turn it inside out.

5. Sew close to the edge all around the circle and shut the opening at the same time.

6. Make the tunnel for the drawstring and sew twice around the circle. Starting at the right and afterwards at the left side of that buttonhole.

Drawstring Playmat (7)

If you look closely you can see my seams in the picture below.

Drawstring Playmat (2) ausschnitt

7. Put in your drawsting and sew those ends of the drawstring together so that the drawstring completely sinks into the tunnel. That way the child won’t stumble over it when playing.

Drawstring Playmat (1)

And that’s it. You’re done.

I made a matching little drawstring bag for him to take some toy cars to a restaurant – he can’t always drag around dozens, can he?!

Drawstring bag

Happy Weekend everyone!
Christine

Friday, June 8, 2012

Quilt Cars 'n Dots

I finished this Babyquilt today...


When I started out with these fabrics (Ann Kelle and some dots from my local fabric store with no credits on the selvages), I  just wanted to make a patchwork quilt. No sashing, no borders. But IMO it looked too busy.


I sliced some of the dotty squares and framed them wonkily in white.


Huh. Still not happy.

Next I decided to give it a little more structure. I opted for regular layout instead of random. Better now.


I added a pieced backing... with leftover squares from the top. (I will one day do this one again - and use it as a top... like it veeeeeeeeeeery much...)


And free motion quilted some squares and rectangles...


Today, I added a srappy binding (with leftovers from the top). I attached the 2,5" binding to the front, folded it over to the back and used a decorative (circle) stitch of my sewing machine to finish the binding (stitching from the front side). 


What I liked best about making this quilt is that I made parts of it "open air": The first warm days at the beginning of May were turned into an "Ironing Outdoors Event"...


 ...and a really hot Whitsun made me take outdoors my sewing machine for the first time ever to FMQ on the porch. I actually finished FMQ on two quilts that day :o) 

Usually I don't even dare to sew when the kids are home. But give them some water to play with in the garden and they are happy and let me have my way all day long :o))) Yayyy!


And as this one didn't turn out the way I had planned it (all Patchwork), I guess I will have to re-add a "real Patchwork Quilt" to my to do list.

Happy Sewing everyone!
Christine
Related Posts Plugin for WordPress, Blogger...