Showing posts with label Patchwork. Show all posts

Friday, November 10, 2017

Off-centre: A modern baby girl quilt

Maybe even too modern?

Lenis Quilt

What do you think? It is off-centre, has lots of negative space, wonky squares and linear and free-motion quilting.

Detail of quilting2

Detail of quilting1

I regret using a contrasting white Aurifil for the quilting. It works well within the white frames but I think I should have chosen a blending thread for quilting the negative space.

Binding and backing

The back is more little-girl-ish: Anne Kelle’s Kites on flannel surprisingly matched well with most of the scraps I used within the wonky squares.

Applique

Of course it showcases the baby’s name.

Detail of applique

I chose raw-edge appliqué again but changed the width often to match the width of the letters/strokes (does that make sense? You can see the width difference in the photo above).

Leni rolled up

So, all in all, what do you think? Too modern for a new born? Too much grey?
I’d love to hear your thoughts!

Happy quilting everyone!
Christine

Wednesday, October 25, 2017

Defractured – a baby boy quilt

I can’t believe I actually finished a quilt. It’s been such a long time! Don’t get me wrong: I haven’t been quilting much lately, infact I haven’t been sewing much at all (my mojo went missing). But FINISHING a quilt that’s something that has not happened here for a very loooooong time…

All that was needed to get me going was another baby to be born. Not mine. But my friends’. And another one (from my sister). And another one (from my colleague at work). So even if I finished ONE quilt now, I am already late for the other two… (stay tuned for more though, I am on a roll recently…)

And now, without much further ado, here is the baby quilt that I made for my friend’s second son:

Quilt Vincent Kopie

In the upper left, the hexagons are still regular. They start to fall apart in the lower left part and are completely defractured in right half. Things can be pretty in life even if they are irregular. Harmony can be found in the oddest shapes, forms and places.

I combined low volume fabrics with vibrant boy-ish prints in blue, turquoise, grey, and different shades of green.

Detail of quilting 2

I decided to keep the quilting simple: I used the stitch-in-the-ditch method and only quilted within the main (block) seams.

Detail of quilting

I used a white backing with little blue pluses and a scrappy binding from leftover low volume strips.

Binding and backing

No baby quilt leaves this house without the baby’s name on it! Although I am not a huge fan of serifs, I instantly fell in love with this font. I admit that I hated those tiny serifs even more when tacking them down with my sewing machine. I used a broad zig zag stitch for this raw-edge appliqué.

Name applique

One last photo and I am off to visit the newborn!

Photo of photo

May there be many more babies to come (or I will never finish my WIPs).

Do you sometimes need some extra motivation? Did you ever loose your mojo? How did you get it back? Any tips or tricks that you want to share?

Happy Quilting!
Christine

Thursday, May 18, 2017

Zen Chic Inspired – a design challenge and a giveaway

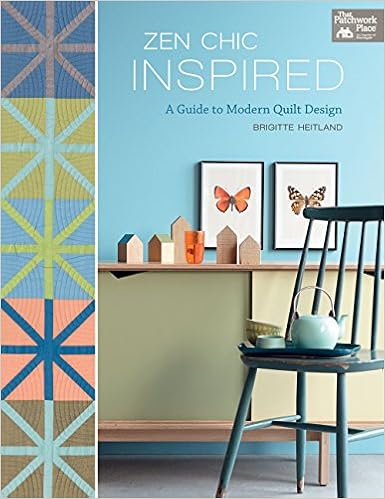
As you might have seen, Brigitte Heitland, the person behind “Zen Chic”, published her first book with Martingale.

the book
In “Zen Chic Inspired” she describes her approach to designing quilts that really match one’s peronal style. She begins by questioning if you ever bought fabric that you loved when it was on display at your LQS but at home you realise that it looks less appealing and strangely out of place?! Yes. Me. Guilty.

She then shows how to design quilts that match your living space: your flat, your house, your mobile home. She starts from a photograph of a room and deducts shapes and colours from it.

the challenge
When she wrote the book, several members of our Modern Quilt Guild Bielefeld, helped her sewing the quilt tops (yes, me too). Brigitte threw a party when she received the first copies of the book and we had a blast sketching quilt designs based on random photographs that evening. We decided to carry it a bit further and to make a little MQGB challenge – just for fun. Brigitte chose a picture and we were to make a matching quilt, mini quilt, table runner, wall hanging, etc. based on it.

Houseology Interiors, flickr
photo by Houseology Interiors, flickr

fabrics and colours
In her book Brigitte shows different ways to deduct colours from a photo. I tried Moda’s Palette Builder: but seeing that I was on a short timeline (no time for ordering and waiting for shipping of chosen fabrics) I pulled solid fabrics from my stash instead:

IMG_0621

design
Next up was shapes and design. I liked the shapes of the lampshades but as there is similar quilt in Brigitte’s book I thought it might be too simple to just copy her quilt. I still wonder how it happend that I chose the wall clock instead.

Here’s a close up of the clock:

wall clock

And these were my first thougts for a possible design:

IMG_0719

I never made a dresden plate before so this was entirely new to me. I thought of differnt sizes for the wedges and of using negative space between them.

work in progress
I found a tutorial “how to make your own dresden plate template” here and just followed the instructions. Easy peasy. I can recommend this tutorial, if you ever want to make dresden plate templates in your exact size.

Once done with sewing the wedges together (I skipped the wonky idea and made a “traditional” dresden plate), I wondered how to achieve that translucent look of the wall clock. I opted for a second layer, more fragile and quite thin. I made another template and drew the design directy onto the paper side of a fusible web.

IMG_0625

The next step was tedious. I ironed the fusible web onto a light grey fabric and had to cut out all the shapes with an exacto-knife.

IMG_0628

The dresden plate was ironed onto the background fabric and the second layer was ironed onto the dresden plate:

IMG_0644

I appliquéd the second layer with my sewing machine, using a wide and dense zig zag stitch in a similar light grey aurifil thread. Thereby I attached two layers in one step. Here is close up shot:

Detail of applique

I kept the quilting fairly simple and just stitched some straigt lines “radiating” from the tips of the wedges, using a white aurifil thread.

the result

Mini Quilt Zen Chic Inspired Challenge

The binding is made of the same newspaper print (from Brigitte’s Modern Background fabric line) that I used to break up the solids-only-look of the dresden plate.

I added a zipper and an extra backing at the back so this mini quilt can double up as a pillow cover.

IMG_0702

Here’s a photoshop image, showing how the mini quilt might look as a wall hanging in the original room:

Graphic mit Mini Quilt

summary
This challenge was a greate experience for me. If you look at the quilts I made during the last years you will discover that I rarely follow quilt patterns. I love to make up my own designs. This book helps me to get better at choosing fabrics and designs matching the surroundings/ person the quilt is intended for. When I plan to sew a quilt for my sister next, I’ll snap a photo of her home first. Of course I know her living room, but do I really remember the hues of green she used for decorations? No. And I might not have noticed the unique shape of that armchair leg that I could use as a shape in my quilt design.

So if YOU like to design your own quilts, this book is for you. And if YOU have always be terrified by the thought of designing your own quilt, this book is for you, too! I takes you step by step through the design process and includes 12 patterns, deducted from 12 different photos of 12 living spaces.

If you’d like your own book, Brigitte offers signed copies here.

giveaway
As a bonus for those who read through this lengthy post, I will give away one copy of “Zen Chic Inspired” AND the mini quilt I made. Just leave me a comment below, telling me if you prefer to design your own quilts or if you rather follow quilt patterns (there are so many lovely ones out there!).

This giveaway is open until midnight, May 29th, CEST. I will draw a random winner on May 30th.

Happy sewing everyone!
Christine

P.S. If you’d like to see who else participated in the challenge and what they designed for the same room, click here and here.

P.P.S. Yes, Brigitte is my friend but yes, these thoughts are my thoughts and I really like the book. And no, I don’t get paid for writing a review and yes, I really bought this book to give it away to you.

Monday, March 14, 2016

Simple Squares - A homage to Gerhard Richter

Another quilt finish inspired by modern art. A homage to Gerhard Richter
 
http://www.theguardian.com/artanddesign/jonathanjonesblog/2011/sep/07/gerhard-richter-painting-never-dies
Photograph: Graeme Robertson, found on TheGuardian.com; click image for origin and more information
 
The german artist (pictured above during a vernissage at Tate Modern in 2011) is considered one of the greatest artist of our time. In the 1960 and 1970 he explored abstraction using colour charts - arranged in squares or rectangles.
 
I loved the idea of colourful squares and when I stumbled across this notebook, I decided to make a quilt with the majority of squares in neutral colours - grey, white-ish and black.
 
 
http://www.remember.de/en/Office-oxid/Stationery/Memolinos/Memolino-Random.html?listtype=search&searchparam=random
 
To make things as quick and easy as possible, I used Kona Cotton Charm Packs and tried to cluster them by colours, only seperated by neutrals. So that most green hues would be close together and so on...
 
 
For the first time ever, I used a wavy stitch of my sewing machine and a walking foot. Light grey variegated Aurifil makes for a nice contrast.
  

Here's another close-up shot:
 

I used Brigitte aka Zenchic's "Reel Time Screens Ink" fabric for the backing and a scrappy grey and black binding with a triple zig zag stitch to tack it down.
 
 
I machine stitched a quilt label and sewed it down by hand, using Aurifil's variegated floss:
 
 
The quilt is meant to be used daily but I like to imagine it as a wall hanging, too.
Here's a photoshop version of my idea:
 
 
The quilt was gifted to someone special who could do with a cheer-up recently.
I might be tempted to add, that this is one of my favourite quilt finishes ever.
Thank you, Mr. Richter and Remember.de for your inspiration.
 
Happy quilting everyone!
Christine

Sunday, October 4, 2015

Railfence – a scrappy baby boy quilt

A sweet baby boy was born in late june. My friend Verena and I, we made him a gift inspired by this pillow.

Henriks Quilt Kopie

We chose lots of black & white prints (many from ZenChic’s new line Modern Backgrounds “Paper”) and some blue, turquoise, green and yellow scraps.

Detail1

We used raw-edge-appliqué to “write” his name on the back:

Detail letter

Detail3

Here are some of my favourite blocks: some crowns…

Detail7

… newspaper advertising…

Detail2

…crossword puzzles…

Detail8

…and some funky glasses…

Detail9

I only stitched in the ditch of those inner seams, which makes a nice pattern on that flannel star-y backing:

Detail4

We used left overs from the top for a scrappy binding. My favourite is this leaf-y print from Lotta Jansdotter:

Detail5

As always, I used a triple zig-zag-stitch to sew the binding down with my sewing machine:

Henriks Quilt binding

Here is another shot, all rolled up and ready to be gifted:

Henriks Quilt rolled up

So easy and so much fun to make. Now to perpare another baby quilt for my cousin that is due with her second baby in December…

Happy Quilting!
Christine

Sunday, February 1, 2015

More baby gifts

In addition to the wonky pinwheel quilt we made for my friend, I made her a giant pillow cover (80x80 cm), that can double up as a duvet while the little man lies in his pram.

It all started with this fabric pull from my stash:

Pillow cover fabrics

After piecing a simple patchwork top, it was time to choose threads.

Pillow cover thread

White Aurifil and a simple dogwood design made the race.

Pillow cover quilting

I hid half of the zipper in the binding so that it is hardly visible when closed.

Pillow cover backing and zipper

As long as the baby is still young, the pillow cover can be used as a duvet cover in winter. During summer the pillow cover can be used without filling and makes for a light blanket. Once he’s bigger he can use it with his new quilt. And even as a youth he needn’t be ashamed for still using his “baby pillow” (o:

Pillow cover

I made a little sleep bag that unzips completely so it can be used as a changing pad, too. But I was in such a rush that I forgot to take proper photos )o:

sleep bag

I used two layers of cotton batting, a heavyweight cotton fabric for the outside and a soft and cosy flannel for the lining. It makes a unique and rather quick baby shower gift so I guess I’ll come back to this concept sooner or later…

And last but not least I made two easy receiving blankets (about 1,10 by 1,10 m) by simply serging jersey fabric (a thicker one for cold days and a light one for summer):

receiving blankets

And who could live without dummy clips?! When finishing the ones for Valentin, I made two girl-ish ones for my niece. Because I can.

Dummy clips

Somehow sewing for babies is so rewarding. Isn’t it nice to see them in clothes or quilts or blankets that are handmade with love?

Or am I the only one?!

Have a nice new week and month, that is!
Christine

Related Posts Plugin for WordPress, Blogger...