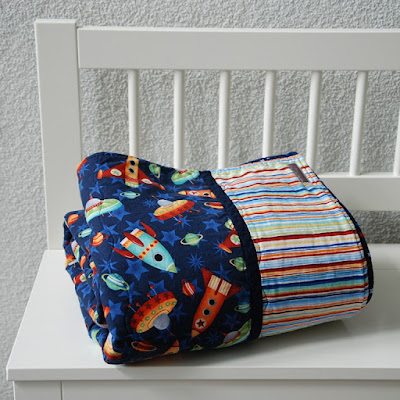
Showing posts with label Boy Quilt. Show all posts

Thursday, December 29, 2016

An old friend revisited

Remember this sweet baby quilt? I made it years ago and was never able to let it go (aka give it away). But I finally found a home for it – my sister’s third baby received it for his christening.

I had to go back to fix it before wrapping and gifting, though. Back then I chose a zigzag stitch that was too narrow for the raw-edge appliqué. So the fabric began to fray after the first wash. Duh.

Fraying_thumb[2]

So I added another MUCH wider zigzag stitch to stop the fraying…

Detail of quilting_thumb[2]

… and I added the little boys name, too. Thankfully my sister and my BIL chose another short name – very sewist-friendly (o;

Letters_thumb[2]

Here’s a full view of the fixed version. One hardly recognizes the added stitches from a distance, does one?

Theos Quilt_thumb[9]

I am happy I was finally able to let it go. Because that’s what quilts are meant for, aren’t they? To bring joy and comfort to someone we love.

Happy quilting!
Christine

Sunday, February 1, 2015

More baby gifts

In addition to the wonky pinwheel quilt we made for my friend, I made her a giant pillow cover (80x80 cm), that can double up as a duvet while the little man lies in his pram.

It all started with this fabric pull from my stash:

Pillow cover fabrics

After piecing a simple patchwork top, it was time to choose threads.

Pillow cover thread

White Aurifil and a simple dogwood design made the race.

Pillow cover quilting

I hid half of the zipper in the binding so that it is hardly visible when closed.

Pillow cover backing and zipper

As long as the baby is still young, the pillow cover can be used as a duvet cover in winter. During summer the pillow cover can be used without filling and makes for a light blanket. Once he’s bigger he can use it with his new quilt. And even as a youth he needn’t be ashamed for still using his “baby pillow” (o:

Pillow cover

I made a little sleep bag that unzips completely so it can be used as a changing pad, too. But I was in such a rush that I forgot to take proper photos )o:

sleep bag

I used two layers of cotton batting, a heavyweight cotton fabric for the outside and a soft and cosy flannel for the lining. It makes a unique and rather quick baby shower gift so I guess I’ll come back to this concept sooner or later…

And last but not least I made two easy receiving blankets (about 1,10 by 1,10 m) by simply serging jersey fabric (a thicker one for cold days and a light one for summer):

receiving blankets

And who could live without dummy clips?! When finishing the ones for Valentin, I made two girl-ish ones for my niece. Because I can.

Dummy clips

Somehow sewing for babies is so rewarding. Isn’t it nice to see them in clothes or quilts or blankets that are handmade with love?

Or am I the only one?!

Have a nice new week and month, that is!
Christine

Saturday, January 31, 2015

MQG Bee Quilt

At the end of November our Modern Quilt Guild Bielefeld received a new addition: our second Guild Baby!! We knew beforehand that our Guild member and my close friend was expecting a boy. So we considered several blocks and colour schemes that suited our plans for a bee quilt for the little man.

Not too many matching points (for easier assembly – somehow the quarter inch of seam allowance varies with every person?!) and not too difficult so that even the newbies could join in.

We decided on a wonky pinwheel design, using low volume prints for the background and blues, greens and greys for the pinwheels.

MQGB Valentin

I volunteered to make the quilt top, baste, quilt and bind it, so I was in charge of the layout, too. This was the first attempt: All blocks arranged, I tried to spread the colours evenly. (Sorry for the bad shot, the blocks are hanging on my design wall, down in the basement –> bad lighting)

MQGB Valentin blocks on design wall

I thought the effect was too chaotic and that the wonky pinwheels were not as clearly visible as I had hoped for. So I made some more blocks and added a border.

MQGB Valentin Top

I quilted it with semi-leaves (is there an official name for this quilt design?!) and stitched in the ditch to reach the next pinwheel. That way I could quilt coherrently, without breaking threads for every new pinwheel.

MQGB Valentin quilting

Here’s a closeup. I used a white Aurifil so that the thread blends with the background fabrics where I stitched in the ditch while it stands out within the pinwheels.

MQGB Valentin closeup quilting

I machine embroidered the quilt label and one of our bee memberes stitched it down by hand. Who would have thought that Aurifil’s cotton thread doubles up as embroidery thread, too?!

MQGB Valentin machine embroidery

This is the finished label and you can see the flannel backing I chose. Don’t you love it when the stars line up and you find the perfect backing?!

MQGB Valentin backing and label

As for the binding… never change a winning team, right? It seems like my triple zig zag stitch and I are BFF.

MQGB Valentin binding

For the binding fabric I chose a rather subtle one. I tried different colours from the original colour scheme but all blues and greens that I tried were… just… too much.

I rather like the effect of this lower toned binding (if I dare say so myself).

MQGB Valentin folded

Here’s one last shot of the quilt with part of the backing flipped over.

MQGB Valentin flipped over

If you’d like to see my friend unwrapping the quilt during our last MQG Bielefeld sew-in, hop over to our website.

Is anyone interested in a tutorial for the wonky pinwheel blocks? I wrote a quick and easy tutorial for our bee members. It is in german but I could translate it if someone should be interested. Just leave me a comment (o:

Oh and by special request I took photos of the binding process so there’s a tutorial on that triple zig zag binding coming soon!

Thank you very much for stopping by.
Happy Quilting!
Christine

Monday, April 28, 2014

A Baby Boy Patchwork Quilt

My youngest sister had her first baby in February. A sweet little boy. They named him Oskar and you’ll never guess what I made for him…

Ta da…

Oskar Quilt lighter Kopie

A rather soft-toned little patchwork quilt with his appliqued name. (Well, how DID you know it was a quilt?!)

Oskar Quilt applique

I chose the striped background to make it look like the name was written on lined paper. I raw edge appliqued the letters and outlined them with black Aurifil in a rather careless, wonky way. I like the effect so much that I will surely come back to this method often.

I free-motion quilted the patchwork part with dogwood quilting, one of my favourite quilting designs ever. As there are much more light fabrics, I used a white 50 wt. Aurifil so the thread blends well with most fabrics and just adds texture. The striped part was fmq using straight lines within the white stripes (see photo above).

Oskar Dogwood Quilting

And the same light striped fabric was used for the binding. If I knew where I bought it or what it name was I’d buy some more, I really grew fond of this versatile fabric! For the backing I used a dark grey fabric with white and green butterflies that I’ve had in my stash for ages.

Oskar Binding backing and name tag

And then I tried something new. When my husband gave me this sewing machine for christmas 2012, it came with an automatic embroidery module. I never tried it because I never wanted to sacrifice the little spare time I have for reading the manual.

Then I decided that Oskar’s Quilt needed a proper label and eventually I read the manual and installed the hoop. I could not make it work. I read the manual multiple times but the hoop did not move. After spending two hours muttering and swearing I called the Pfaff Dealer in complete desperation.

It turned out that I only forgot to remove a little transport securing plastic device. Stupid me. After 2,5 hours I made it work:

Oskar label making

In the end I was so happy with this little label that I am sure I will make many more (Now that the darn plasting thingy is gone…)

Oskar Quilt label

Now guess what happend?! Little Oskar likes his quilt! See??

Oskar close up_lr

Isn’t he cute as pie? And he is sooooo “well behaved”! He sleeps well, he eats (or rather drinks) well, he seldom cries (and only with a low voice). He is such a handsome litte baby boy!

Thank you, dear brother-in-law for that lovely photo! And thanks for your permission to use it on my wee little blog (o:

Happy Quilting!
Christine

P.S. As you can see from the label, I made this quilt in january. The baby was born at the beginning of february. It “only” took me 2,5 months to write a blogpost. Guess how much sewing has been done during the last 4 months? Nearly nothing. My daytime job is so exhausting at the moment.

I so long for more time (and energy!) to sew. Even on the occasional afternoons off (when the boys are visiting friends or grandma), I can’t gather enough energy to sew. I am tired all the time. I can’t count the evenings when I headed downstairs for my sewing room, turned on the lights, looked at my WIPs and turned the lights off again.

Does this happen to you sometimes? How do you get over it? Is there a tried and proven method?

Saturday, October 26, 2013

Dare to be different – A finished Quilt

Yay! I finally finshed the scrapbuster swap quilt. It was my first swap ever and the first round was postage stamp blocks. I made a bunch of blocks, send them off across the big ocean…

Scrapbuster Swap (3)_bb

… and received colourful scrappy blocks from around the world. I wanted the quilt to be big enough to serve as a throw quilt and added more blocks…

Scrapbuster Swap after Swapping (1)_bb

But I alwasy felt that the quilt was too busy and lacked a bit of interest and a little special something. And then, two years ago, inspiration came disguised as a book:

51ulvedxXcL._SX258_PJlook-inside-v2,TopRight,1,0_SH20_BO1,204,203,200_

I knew how I wanted to use all those scrappy swap blocks. I made several grey elephants out of grey linnen. I made Elmer from more scraps and then I got stuck halfway down the way. I needed a background fabric and I was not sure how to arrange the blocks. Elmer in between colourful rows?

So what did I do? I put the entire project in a box and let it rest for almost two years. Am I the only one?!

Three weeks ago, I finally took it out again and suddenly everything went on smoothly. I made some more blocks, decided on a block layout (KISS: keep it simple and stupid) and made a reversible quilt:

Elmar Quilt Top3

And I won’t even try to diguise how happy I am with the final result. I loooooove this quilt. Both sides of the quilt. And as it is going to be used on our sofa, there is no chance that only one side will be visible.

Elmar Quilt Back

I love how some scraps bring back memories of quilts I made and there are also squares of Mini Charm Packs that my friend Brigitte brought home from Quilt Market. I also used scraps from her four fabric lines for moda. And I love the thought, that this quilt also represents memories that my fellow swappers have of quilts that THEY made.

Elmar Detail

Here’s a close up of Elmer. Elmer is not grey like all the other elephants and at first is uncomfortable with his appearance. But by and by he realizes that his personality is not defined by his appearance and that he is happiest when he is himself – without disguise or pretentions.

A lesson I try to teach my two little sons as well: dare to be different!

Elmar Quilting Detail4

So I kept the other elephants without details. I didn’t even bother to make them eyes. Only Elmer stands out. I wanted to stress his differentness by enhancing the sameness of the others.

Elmar Quilting Detail

I free motion quilted Orange Peels all over the quilt. I quilted with the patchwork side facing up, using the squares as a natural grid and using a blending grey thread for the “back”. Then I turned the quilt and stitched in the ditch of Elmer’s patchwork. Afterwards I turned the quilt again and quilted only horizontal Orange Peels (or Petals) through the other elephants.

Elmar Quilting Detail2

This is a look at the back and top. I love how the Orange Peels turned out - if I do say so myself (: I thought about Dogwood at first but somehow thinking of elephants I rather thought of Orange Peel…

Elmar Quilting Detail3

I used those Ann Kelle remix stripes as a binding and my favourite method of attaching the binding: the triple zig zag stitch of my sewing machine.

Elmar Quilt Top Binding

et voilà:

Elmar Quilt Top

One last shoot with the patchwork side peeking over…

Elmar Quilt Top2

It is that time of the year again: It’s Blogger’s Quilt Festival again! There’s so much to be seen and so many lovely stories to be read.
This quilt is my entry for this fall. I’d say it is a Group Quilt or Scrappy Quilt.

AmysCreativeSide


Thank you very much for vising.

Please consider leaving a comment, that way I can hop over to your entry, too!

Happy Quilting everyone and remember: dare to be different!
Christine

Saturday, September 22, 2012

My Quilt for Craft Book Month

Craft Book Month at Craft Buds

Oh yes, I do love craft books. And there’s one that I bought just because I liked the cover and wanted to know what’s more inside ;o) And I wasn’t disappointed.

Imagesource: amazon.com

Jessica Levitt’s Modern Mix is all about combining your favourite prints with solids. So much inspiration! And in May I really made the cover quilt ;o)

Quilt Zoology Circles_ed

Although I must confess that I changed the pattern a bit. It called for turn-under edges for the circles and I used raw edge appliqué instead. And I changed the dimensions according to my needs (baby quilt). I used Ann Kelle’s Urban Zoologie (again) and used my GO! Baby Circle Cutting Die. I had quite a hard time deciding on the background colour as Kelle’s colours are so bright and vibrant and I didn’t want to steal their show. But I am sooooooo pleased with how it turned out in the end!

I free motion quilted circles in different sizes all over the quilt – but behold! I cheated again – I was afraid of messing up the bigger ones so I traced around some large round objects (mostly lids) and quilted the shapes afterwards.

Quilt Zoology Circles FMQ_ed

The only frustration is that I chose a zigzag stitch that is too narrow. Some circles start fraying and might be torn off entirely so I will have to secure them with additional stitches. Oh well.

You can find my initial post with more photos here. I’m going to link up to Craftbuds, you might want to hop over and have a look at what smarter people have come up with ;o)

Happy Sunday everyone!!!
Christine

Thursday, July 19, 2012

Space Rocket Quilt

Yesterday evening I finished a quilt for my eldest son. I made my first quilt ever for him which turned out to be too small by the time it was finally completed. One evening when I was searching the Fat Quarter Online Shop he pointed at the pictures of “Space by Makower” and  asked me to buy him “some rockets”. Secretly I bought some and I turned it into a light summer quilt. I gave it to him this morning and he is dragging it around the house ever since he came back from kindergarten. His little brother was refused to even touch it. Which provoked tears and jealous screams. I guess I will have to make another one…


For the backing I chose a stars print that I already had in my stash…


I added a little appliqued star as a quilt label…


I drew connecting stars with a water-soluble pen and FMQ the silhouettes.


Some more quilting within the appliqued rocket…


… and it was done!


Hopefully it will be used frequently… and that’s why I opted for a no-binding finish using the envelope method.

Happy Sewing!
Christine
Related Posts Plugin for WordPress, Blogger...